How to Install Packet Tracer Networking Simulator on Linux

 How To, Linux, Networking  Comments Off on How to Install Packet Tracer Networking Simulator on Linux
Mar 312019
 

For anyone starting on the rewarding journey into computer networking, Packet Tracer is an indispensable learning tool.

If you’re planning to take the Cisco Certified Network Associate (CCNA) ) exam, you must practice on the Packet Tracer networking simulation software from Cisco.

Packet Tracer

Download Packet Tracer

On Cisco’s Networking Academy web site, the latest 64-bit version of Packet Tracer is available for both Linux and Windows for free.

So I headed to Cisco’s Packet Tracer Download web site and downloaded the Packet Tracer 7.2.1 tarball for Linux.

Before you can download Packet Tracer, you must register with the site.

For the purpose of this post, I downloaded Packet Tracer 7.2 to a 10-year-old Dell 780 desktop PC running Linux Mint 18.3.

(By the way, I tried the Windows version of Packet Tracer too and got it to work without sweat. Since my Windows 10 laptop is an anemic device with just 4GB RAM, I prefer to run Packet Tracer on my Linux PC, which has a more generous 8GB RAM.)

Extracting the File

I extracted Packet Tracer 7.2.1 into the same folder in which I had downloaded the file.

Now that you have downloaded the Packet Tracer software, fire up your terminal and extract the software (see command below).

mike@familypc ~/Downloads/Packet-Tracer $ tar -xvzf Packet-Tracer-7.2.1-for-Linux-64-bit.tar.gz
art/
art/IoE/
art/IoE/Sensors/
art/IoE/Sensors/MotionSensor.png
art/IoE/Sensors/GenericSensor.png
[output truncated]
templates/Smart LED.ptd
tpl.linguist
tpl.packettracer
mike@familypc ~/Downloads/Packet-Tracer

Now that we completed the extraction, let’s take a quick look at the folder.

mike@familypc ~/Downloads/Packet-Tracer $ ll -a
total 305296
drwxrwxr-x 11 mike mike      4096 Mar 29 20:11 ./
drwxr-xr-x 18 mike mike      4096 Mar 24 16:19 ../
-rw-rw-r--  1 mike mike    710787 Mar 26 22:19 1.2.4.4 Packet Tracer - Help and Navigation Tips.pdf
drwxrwxr-x 24 mike mike      4096 Dec  9 23:45 art/
drwxrwxr-x  6 mike mike      4096 Dec  9 23:45 backgrounds/
drwxr-xr-x  8 mike mike      4096 Dec  7 15:41 bin/
-rw-rw-r--  1 mike mike    172942 Mar 17 17:31 Cisco Packet Tracer FAQs.pdf
-rwxrwxr-x  1 mike mike     14510 Dec 14 20:23 eula721.txt*
drwxr-xr-x 15 mike mike      4096 Dec 10 18:44 extensions/
drwxr-xr-x  3 mike mike      4096 Dec  7 15:27 help/
-rwxr-xr-x  1 mike mike      4134 Dec 14 19:56 install*
drwxrwxr-x  2 mike mike      4096 Dec  9 23:45 languages/
-rw-rw-r--  1 mike mike 311645539 Mar 17 17:31 Packet-Tracer-7.2.1-for-Linux-64-bit.tar.gz
dr-xr-xr-x 21 mike mike      4096 Dec  9 23:45 saves/
-rw-r--r--  1 mike mike      1237 Dec  9 23:45 set_ptenv.sh
-rw-r--r--  1 mike mike      1207 Dec  9 23:45 set_qtenv.sh
drwxrwxr-x  2 mike mike      4096 Dec  9 23:45 Sounds/
drwxrwxr-x  3 mike mike      4096 Dec  9 23:45 templates/
-rw-r--r--  1 mike mike       159 Mar  5  2018 tpl.linguist
-rw-r--r--  1 mike mike       177 Dec  7 15:40 tpl.packettracer
mike@familypc ~/Downloads/Packet-Tracer $

Everything looks good.

So let’s move to the next step: Running the install script.

Installing Packet Tracer

I did not encounter any major issues in installing Packet Tracer except for a minor bump when the process stopped momentarily and asked for my sudo password to copy the files into opt/pt.

mike@familypc ~/Downloads/Packet-Tracer $ ./install

Welcome to Cisco Packet Tracer 7.2.1 Installation

Read the following End User License Agreement "EULA" carefully. You must accept the terms of this EULA to install and use Cisco Packet Tracer.
Press the Enter key to read the EULA.

Cisco Packet Tracer
Software License Agreement

IMPORTANT: PLEASE READ THIS CISCO PACKET TRACER SOFTWARE LICENSE AGREEMENT (THE "AGREEMENT") CAREFULLY.  DOWNLOADING, INSTALLING OR USING THE CISCO PACKET TRACER SOFTWARE CONSTITUTES ACCEPTANCE OF T
HIS AGREEMENT.  IF YOU DO NOT AGREE TO ALL OF THE TERMS OF THIS AGREEMENT, THEN CISCO SYSTEMS, INC. ("CISCO") IS UNWILLING TO LICENSE THE SOFTWARE TO YOU AND YOU ARE NOT AUTHORIZED TO DOWNLOAD, INST
ALL OR USE THE SOFTWARE.
I.	DISTRIBUTION RIGHTS.  The terms in this Section I (Distribution Rights) of the Agreement apply solely to any Cisco Networking Academy instructor, administrator or other person or entity approved in writing by Cisco Systems, Inc. (each, an "Instructor") to distribute and use the Cisco Packet Tracer software and related documentation (collectively, the "Software") in accordance with the terms and conditions of this Agreement.
	[output truncated]
Cisco, Cisco Systems, and the Cisco Systems logo are registered trademarks of Cisco Systems, Inc. in the U.S. and certain other countries.  Any other trademarks mentioned in this document are the property of their respective owners.
Do you accept the terms of the EULA? (Y)es/(N)o

yes
You have accepted the terms to the EULA. Congratulations. Packet Tracer will now be installed.
Enter location to install Cisco Packet Tracer or press enter for default [/opt/pt]: 
Installing into /opt/pt

Not able to create and copy files to /opt/pt
Should we try to gain root access with sudo? [Yn] y
[sudo] password for mike: 
Installing into /opt/pt
Copied all files successfully to /opt/pt

Should we create a symbolic link "packettracer" in /usr/local/bin for easy Cisco Packet Tracer startup? [Yn] y
Type "packettracer" in a terminal to start Cisco Packet Tracer
Writing PT7HOME environment variable to /etc/profile
Writing QT_DEVICE_PIXEL_RATIO environment variable to /etc/profile

Cisco Packet Tracer 7.2.1 installed successfully
Please restart you computer for the Packet Tracer settings to take effect

Voila, Packet Tracer 7.2 is now installed on my Linux Mint PC.

After rebooting the system, I was able to launch Packet Tracer and get it to work without any issues.

To launch Packet Tracer, head to the terminal and just issue the command packettracer:

mike@familypc ~ $ packettracer
Starting Packet Tracer 7.2.1

But if you’re like me and want to do more with less, you can set up an alias by opening the .bashrc file with nano or vim and inserting alias pt=”packettracer” at the end of the file, save and close it. Don’t forget to run source ~/.bashrc so that you don’t have to close the terminal for the new alias to work. The next time you want to launch Packet Tracer, just type pt instead of the longer packettracer on the terminal.

Overall, I did not encounter any showstoppers in the process of downloading, installing or using Packet Tracer 7.2.1 on my Linux PC.

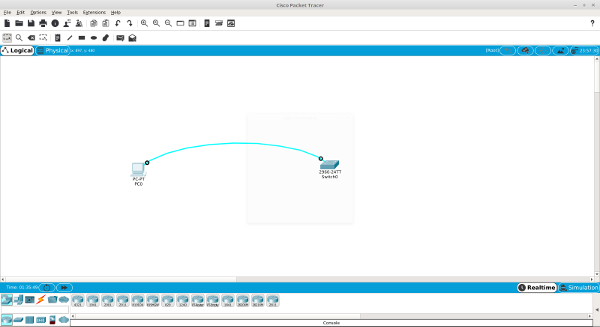
As you can see from the Packet Tracer image at the top of this post, I even moved a PC and switch into the logical work area and hooked them up with a console/rollover cable.

Getting Packet Tracer 7.2 on my Linux desktop PC took about five-minutes.

Since Linux Mint is based on Ubuntu, Packet Tracer should work on Ubuntu too.

One of these days, I’ll test Packet Tracer on my CentOS 7 desktop and see how the process goes.

10 Key IP Commands on CentOS 7 & RedHat 7

 How To, Linux  Comments Off on 10 Key IP Commands on CentOS 7 & RedHat 7
Sep 232018
 

Getting a good handle on IP commands will prove useful if you’re managing a Linux box.

Although ifconfig was deprecated and replaced with ip several years ago, some folks sill use ifconfig.

But it’s good to be aware of the basic ip commands when you’re managing a Linux server.

Here are a bunch of IP commands that were tested on my CentOS 7 box. They should work on a RedHat 7 system too.

1. How to Display IP Addresses

To see the IP addresses on your system and various interfaces, use the ip addr command.

[thomaspc@localhost ~]$ ip addr
1: lo:  mtu 65536 qdisc noqueue state UNKNOWN group default qlen 1000
    link/loopback 00:00:00:00:00:00 brd 00:00:00:00:00:00
    inet 127.0.0.1/8 scope host lo
       valid_lft forever preferred_lft forever
    inet6 ::1/128 scope host 
       valid_lft forever preferred_lft forever
2: enp0s25:  mtu 1500 qdisc pfifo_fast state UP group default qlen 1000
    link/ether 00:25:64:d4:d7:ca brd ff:ff:ff:ff:ff:ff
    inet 10.0.1.50/24 brd 10.0.1.255 scope global noprefixroute dynamic enp0s25
       valid_lft 57035sec preferred_lft 57035sec
    inet6 fe80::e64d:5dda:2def:dfbe/64 scope link noprefixroute 
       valid_lft forever preferred_lft forever
3: virbr0:  mtu 1500 qdisc noqueue state UP group default qlen 1000
    link/ether 52:54:00:13:72:5b brd ff:ff:ff:ff:ff:ff
    inet 192.168.122.1/24 brd 192.168.122.255 scope global virbr0
       valid_lft forever preferred_lft forever
4: virbr0-nic:  mtu 1500 qdisc pfifo_fast master virbr0 state DOWN group default qlen 1000
    link/ether 52:54:00:13:72:5b brd ff:ff:ff:ff:ff:ff
7: vnet0:  mtu 1500 qdisc pfifo_fast master virbr0 state UNKNOWN group default qlen 1000
    link/ether fe:54:00:ed:b0:ce brd ff:ff:ff:ff:ff:ff
    inet6 fe80::fc54:ff:feed:b0ce/64 scope link 
       valid_lft forever preferred_lft forever

Let’s next examine how to check for information only on a particular interface.

2. Display Information for a Specific Interface

The below command will display information only on a particular interface.

[thomaspc@localhost ~]$ ip addr show dev enp0s25
2: enp0s25:  mtu 1500 qdisc pfifo_fast state UP group default qlen 1000
    link/ether 00:25:64:d4:d7:ca brd ff:ff:ff:ff:ff:ff
    inet 10.0.1.50/24 brd 10.0.1.255 scope global noprefixroute dynamic enp0s25
       valid_lft 56947sec preferred_lft 56947sec
    inet6 fe80::e64d:5dda:2def:dfbe/64 scope link noprefixroute 
       valid_lft forever preferred_lft forever
3. Show Various Network Interfaces

The ip link command provides information on the state of different network interfaces.

[thomaspc@localhost ~]$ ip link
1: lo:  mtu 65536 qdisc noqueue state UNKNOWN mode DEFAULT group default qlen 1000
    link/loopback 00:00:00:00:00:00 brd 00:00:00:00:00:00
2: enp0s25:  mtu 1500 qdisc pfifo_fast state UP mode DEFAULT group default qlen 1000
    link/ether 00:25:64:d4:d7:ca brd ff:ff:ff:ff:ff:ff
3: virbr0:  mtu 1500 qdisc noqueue state UP mode DEFAULT group default qlen 1000
    link/ether 52:54:00:13:72:5b brd ff:ff:ff:ff:ff:ff
4: virbr0-nic:  mtu 1500 qdisc pfifo_fast master virbr0 state DOWN mode DEFAULT group default qlen 1000
    link/ether 52:54:00:13:72:5b brd ff:ff:ff:ff:ff:ff
7: vnet0:  mtu 1500 qdisc pfifo_fast master virbr0 state UNKNOWN mode DEFAULT group default qlen 1000
    link/ether fe:54:00:ed:b0:ce brd ff:ff:ff:ff:ff:ff

The ip link command can also be used to get an interface online or offline.

4. How to Add an IP Address

The below command will show you how to add an IP address using the ip addr command.

[thomaspc@localhost ~]$ ip addr add 192.168.0.77/24 dev enp0s25

The above command adds address 192.168.0.77 with netmask 24 to device enp0s25

5. How to Delete an IP Address

With the ip addr del command, deleting an IP address is simple.

[thomaspc@localhost ~]$ ip addr del 192.168.0.77/24 dev enp0s25
6. How to bring a Network Interface Up?

Learning how to bring a network interface up is essential for a Linux system administrator.

[thomaspc@localhost ~]$ sudo ip link set em1 up

The above command will bring enp0s25 online.

7. How to bring a Network Interface Down?

There might be occasions when you need to bring a network interface down on our CentOS 7 system.

For such situations, go with the following command.

[thomaspc@localhost ~]$ sudo ip link set enp0s25 down

The above command will take enp0s25offline.

You can check if the interface enp0s25 has been taken offline via the following command:

[thomaspc@localhost ~]$ ip addr show enp0s25
enp0s25:  mtu 1500 qdisc pfifo_fast state DOWN group default qlen 1000
    link/ether 00:25:64:d4:d7:ca brd ff:ff:ff:ff:ff:ff
    inet 10.0.1.50/24 brd 10.0.1.255 scope global noprefixroute dynamic enp0s25
       valid_lft 79017sec preferred_lft 79017sec

As you see from the above output, the network interface enp0s25 is indeed down.

8. How to Check the Routing Table?

You can use ip route show to check the routing table (previously, you were likely using the route command.

[thomaspc@localhost ~]$ ip route show
default via 10.0.1.1 dev enp0s25 proto dhcp metric 100 
10.0.1.0/24 dev enp0s25 proto kernel scope link src 10.0.1.50 metric 100 
192.168.122.0/24 dev virbr0 proto kernel scope link src 192.168.122.1
9. How to Add a Route?

Now, let’s look at how to add an entry to the routing table.

[thomaspc@localhost ~]$ ip route add 192.168.3.0/24 dev enp0s25
10. How to Delete a Route?

To delete an entry from the routing table, run the below command.

[thomaspc@localhost ~]$ ip route del 192.168.3.0/24 dev enp0s25

How to Set Up Mail Accounts on Plesk Control Panel

 How To  Comments Off on How to Set Up Mail Accounts on Plesk Control Panel
Sep 132018
 

Plesk is a user friendly, GUI control panel (like Cpanel or Webmin) for administering web sites and setting up e-mail accounts.

Several hosting providers offer Plesk as part of their hosting package or as an addon service.

This blog post is useful for people who aspire for a role as Support Technician at a web hosting services provider.

Creating E-mail Account on Plesk Control PanelCreate E-Mail Account in Plesk

In this post, we’ll focus on how to set up an e-mail account via Plesk.

1. Login to your Plesk admin panel

2. Click Mail, the second tab on left vertical bar

3. Next, click Create E-mail Address, and set up an e-mail account, contact@example.com

4. If there’s more than one domain, choose from drop-down list

5. Check the “Access to the Customer Panel” box if you want to allow customers to be able to change mailbox settings on Plesk

6. Enter password, confirm it by entering password a second time*
*(Remember to use a complicated password using upper & lower case letters, symbols & numbers by using the generate button below the password box. We recommend that you use a free, open source Password Manager like KeePassX or KeePass).

7. Next, leave the e-mail box size as “Default size” or set your preferred size for the mail-box in MB.

8. Now, click OK to create the mail box

Wasn’t that simple?

How do You Know if MySQL is Running on CentOS 7?

 General, How To  Comments Off on How do You Know if MySQL is Running on CentOS 7?
Sep 122018
 

Just this morning, someone asked me for the command to check if MySQL (or MariaDB) is running?

I quickly blurted out: Do a top or htop and you should see it.

# top | grep mysqld
26125 mysql  20   0 2618520 193692   9092 S  62.5  2.4 159:29.14 mysqld
26125 mysql  20   0 2618520 193692   9092 S   1.3  2.4 159:29.18 mysqld

While my answer was not wrong, I quickly realized there were better ways to find out if MySQL (or MariaDB) is running on a Linux box (in my case, CentOS 7).

Here are a few ways to determine if MySQL is running on a CentOS 7 or Red Hat 7 Linux box.

# service mariadb status
Redirecting to /bin/systemctl status mariadb.service
● mariadb.service - MariaDB database server
   Loaded: loaded (/usr/lib/systemd/system/mariadb.service; enabled; vendor preset: disabled)
   Active: active (running) since Thu 2018-08-30 07:59:30 EDT; 1 weeks 4 days ago
 Main PID: 25949 (mysqld_safe)
   CGroup: /system.slice/mariadb.service
           ├─25949 /bin/sh /usr/bin/mysqld_safe --basedir=/usr
           └─26125 /usr/libexec/mysqld --basedir=/usr --datadir=/var/lib/mysql --plugin-dir=/usr/lib64/mysql/plugin --log-error=/var/log/mariadb/mariadb.log --pid-file=/var/run/mariadb/mariadb.pi...

My favorite is the systemctl method since I use it often to check the status of other services like httpd.

$ systemctl status mariadb.service
● mariadb.service - MariaDB database server
   Loaded: loaded (/usr/lib/systemd/system/mariadb.service; enabled; vendor preset: disabled)
   Active: active (running) since Thu 2018-08-30 07:59:30 EDT; 1 weeks 4 days ago
 Main PID: 25949 (mysqld_safe)
   CGroup: /system.slice/mariadb.service
           ├─25949 /bin/sh /usr/bin/mysqld_safe --basedir=/usr
           └─26125 /usr/libexec/mysqld --basedir=/usr --datadir=/var/lib/mysql --plugin-dir=/usr/lib64/mysql/plugin --log-error=/var/log/mariadb/mariadb.log --pid-file=/var/run/mariadb/mariadb.pi...

Here’s another method to check the status of MySQL server:

$ mysqladmin -u root -p status
Enter password: 
Uptime: 1001300  Threads: 1  Questions: 11923946  Slow queries: 0  Opens: 701  Flush tables: 2  Open tables: 260  Queries per second avg: 11.908

You can always ping it.

# mysqladmin -umysql ping
mysqld is alive

Here’s one more way:

# mysqladmin -u root -p version
Enter password: 
mysqladmin  Ver 9.0 Distrib 5.5.60-MariaDB, for Linux on x86_64
Copyright (c) 2000, 2018, Oracle, MariaDB Corporation Ab and others.

Server version		5.5.60-MariaDB
Protocol version	10
Connection		Localhost via UNIX socket
UNIX socket		/var/lib/mysql/mysql.sock
Uptime:			11 days 14 hours 32 min 44 sec

Threads: 1  Questions: 11943278  Slow queries: 0  Opens: 701  Flush tables: 2  Open tables: 260  Queries per second avg: 11.910

On a Linux Mint or Ubuntu box, the following command should work:

$ /etc/init.d/mysql status
● mysql.service - MySQL Community Server
   Loaded: loaded (/lib/systemd/system/mysql.service; enabled; vendor preset: enabled)
   Active: active (running) since Mon 2018-09-10 02:13:20 EDT; 19h ago
 Main PID: 2250 (mysqld)
   CGroup: /system.slice/mysql.service
           └─2250 /usr/sbin/mysqld

6 Ways to Check if a Package is Installed on a Linux Mint or Ubuntu PC

 How To, Linux  Comments Off on 6 Ways to Check if a Package is Installed on a Linux Mint or Ubuntu PC
Sep 102018
 

This morning I was checking via the command line to see if MySQL Server was installed on my Linux Mint 18 (Sarah) system and fumbled around a bit about how to do it.

Presumably, there are many other Linux users who wish to install a package and unsure how to check it on the command line.

So I decided to do this blog post on the various ways to check if a particular package is installed on a Linux Mint or Ubuntu system.

For each unique method, I will illustrate with two examples (the first example for a package not installed and the second for a package that’s already installed).

1. apt-cache policy Method

Not Installed

$ apt-cache policy mysql-server
N: Unable to locate package mysql-server

apt-cache policy is a quick way to determine if a particular package is installed on a Ubuntu or Linux Mint system.

Already Installed

$ apt-cache policy grsync
grsync:
  Installed: 1.2.5-1
  Candidate: 1.2.5-1
  Version table:
 *** 1.2.5-1 500
        500 http://archive.ubuntu.com/ubuntu xenial/universe amd64 Packages
        100 /var/lib/dpkg/status
2. dpkg -l Method

Not Installed

$ dpkg -l | grep mysql-server

Since mysql-server is not on my system, I did not get any output when I ran the dpkg -l | grep mysql-server command.

Already Installed

$ dpkg -l | grep grsync
ii  grsync        1.2.5-1       amd64        GTK+ frontend for rsync
3. dpkg-query Method

Let’s now consider the dpkg-query way to see if a specific package is installed on Ubuntu or Linux Mint.

Not Installed

$ dpkg-query -s mysql-server
dpkg-query: package 'mysql-server' is not installed and no information is available
Use dpkg --info (= dpkg-deb --info) to examine archive files,
and dpkg --contents (= dpkg-deb --contents) to list their contents.

The above example clearly demonstrates that mysql-server is not installed on my Linux Mint 18 PC.

Already Installed

$ dpkg-query -s grsync
Package: grsync
Status: install ok installed
.....output truncated
4. dpkg -s Method

dpkg -s package_name is another quick way to determine if a package is installed on an Ubuntu system.

Not Installed

$ dpkg -s mysql-server | grep Status
dpkg-query: package 'mysql-server' is not installed and no information is available
Use dpkg --info (= dpkg-deb --info) to examine archive files,
and dpkg --contents (= dpkg-deb --contents) to list their contents.

Already Installed

$ dpkg -s cherrytree | grep Status
Status: install ok installed
5. apt list Method

Not Installed

$ apt list mysql-server
Listing... Done
mysql-server/xenial-updates,xenial-updates,xenial-security,xenial-security 5.7.23-0ubuntu0.16.04.1 all

Already Installed

$ apt list firefox
Listing... Done
firefox/sarah,now 61.0.1+linuxmint1+sylvia amd64 [installed]
N: There is 1 additional version. Please use the '-a' switch to see it
6. dpkg -l | grep package Method

Not Installed

$ dpkg -l | grep mysql-server

Since mysql-server is not installed on my Linux desktop, the above example did not produce any output.

Already Installed

$ dpkg -l | grep firefox
ii  firefox                     61.0.1+linuxmint1+sylvia            amd64        Safe and easy web browser from Mozilla
ii  firefox-locale-en           61.0.1+linuxmint1+sylvia            amd64        English language pack for Firefox

How To Add Guest Additions to Lubuntu 16.04

 How To, Linux, Virtualization  Comments Off on How To Add Guest Additions to Lubuntu 16.04
Apr 262016
 

I have Lubuntu running as a virtual machine via VirtualBox.

Like many Ubuntu fans, I upgraded to version 16.04 LTS (Xenial Xerus) yesterday.

The reason for my upgrade was that Ubuntu 15.10 (a.k.a. Wily Werewolf) was not a Long-term Supported distribution.

Support for Ubuntu 15.10 ends in July 2016 while Ubuntu 16.04 LTS will be supported until April 2021.

The upgrade from Ubuntu 15.10 to Ubuntu 16.04 LTS went smoothly.

Following the upgrade, I rebooted my virtual machine.

And then came the familiar problem all of us confront with VirtualBox – screen resolution issue.

The problem is that the monitor settings (screen resolution) will be off and the desktop will not occupy the full screen.

Irritating but not a showstopper.

However, the problem can be fixed quickly.

This is how I fixed the screen resolution issue after upgrading from Ubuntu 15.10 to Ubuntu 16.04 LTS.

I opened up the terminal and installed virtualbox-guest-dkms.

tommy@johnson:~$ sudo apt-get install virtualbox-guest-dkms
[sudo] password for tommy: 
Reading package lists... Done
Building dependency tree       
Reading state information... Done
The following additional packages will be installed:
  libnotify-bin virtualbox-guest-utils virtualbox-guest-x11
The following NEW packages will be installed:
  libnotify-bin virtualbox-guest-dkms virtualbox-guest-utils virtualbox-guest-x11
0 upgraded, 4 newly installed, 0 to remove and 0 not upgraded.
Need to get 1,986 kB of archives.
After this operation, 13.1 MB of additional disk space will be used.
Do you want to continue? [Y/n] y
Get:1 http://us.archive.ubuntu.com/ubuntu xenial/main amd64 libnotify-bin amd64 0.7.6-2svn1 [6,584 B]
Get:2 http://us.archive.ubuntu.com/ubuntu xenial/multiverse amd64 virtualbox-guest-utils amd64 5.0.18-dfsg-2build1 [387 kB]
Get:3 http://us.archive.ubuntu.com/ubuntu xenial/multiverse amd64 virtualbox-guest-dkms all 5.0.18-dfsg-2build1 [551 kB]
Get:4 http://us.archive.ubuntu.com/ubuntu xenial/multiverse amd64 virtualbox-guest-x11 amd64 5.0.18-dfsg-2build1 [1,041 kB]
Fetched 1,986 kB in 0s (2,399 kB/s)         
....
....

Once the installation is complete, there’s one more step.

You need to reboot the newly upgraded virtual machine (Ubuntu 16.04 LTS).

$ sudo reboot

After rebooting,you should now have access to the full screen.

As simple as that.

Related Posts:
What are Guest Additions?