Installing VMware Workstation 16 Pro is Easy on Linux Mint 21

 Linux, Virtualization  Comments Off on Installing VMware Workstation 16 Pro is Easy on Linux Mint 21
Sep 052022
 

Understanding the basics of virtualization is a good skill to possess in an age when it seems like everything is going virtual or to the cloud.

While Virtualbox may cut it for hobbyists, VMware is the numero uno vendor when it comes to virtualization.

If you ask me, VMware is to virtualization what Cisco is to networking gear.

Install VMware Workstation 16 Pro on Linux Mint 21 Host

VMware – Multiple Offerings

VMware ESXi is for the enterprise while Workstation 16 Pro and Workstation Player do the job well in smaller outfits.

VMware ESXi is overkill for my requirements and its installation is also more complex.

So I opted for VMware Workstation 16 Pro (a Type-2 hypervisor) unlike VMware ESXi, which is a Type-1 hypervisor aka bare metal hypervisor for my Linux Mint 21 computer.

By the way, VMware Workstation 16 Pro is also available for Windows.

Download Workstation 16 Pro

VMware offers two locations to download Workstation 16 Pro software for Linux:
1. https://www.vmware.com/products/workstation-pro/workstation-pro-evaluation.html
2. https://customerconnect.vmware.com/en/downloads/info/slug/desktop_end_user_computing/vmware_workstation_pro/16_0

You can download a 30-day free evaluation copy of VMware Workstation 16 Pro or buy the software outright from VMware or resellers.

After downloading Workstation 16 Pro, make sure you do a sha256sum check to ensure file integrity of the download.

Install VMware Workstation 16 Pro

These are the five steps I followed in installing and testing VMware Workstation 16 Pro on my Linux Mint 21 computer:

Step 1: I made sure I had installed gcc (GNU C compiler) and build-essential. gcc was already on my computer but build-essential was not. So I quickly installed it.

$ sudo apt install build-essential

Step 2: Next, I went to to my Downloads folder (where I had downloaded Workstation 16 Pro) and ran the below command:

$ sudo chmod a+x VMware-Workstation-Full-16.2.4-20089737.x86_64.bundle

Step 3: Complete the Installation:

$ sudo ./VMware-Workstation-Full-16.2.4-20089737.x86_64.bundle
Extracting VMware Installer…done.
Installing VMware Workstation 16.2.4
Configuring…
[######################################################################] 100%
Installation was successful.

Although there was no need to do so, I now did a reboot of my Linux Mint 21 system.

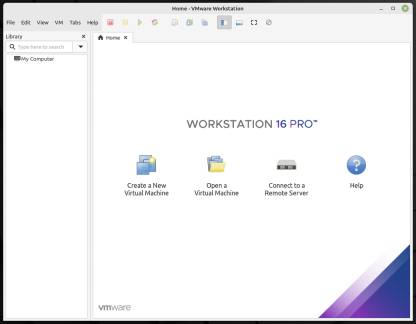
Step 4: Go to Menu in bottom left of your Linux Mint 21 PC and select VMware WorkStation and go through the various install prompts to launch the virtualization software.

Step 5: Test Out VMware Workstation 16 Pro by installing a Guest OS on it.

Install VMware Workstation 16 Pro

I’ve already downloaded  AlmaLinux 9, RockyLinux 9 (both Alma and Rocky are Red Hat 9 clones) and Manjaro ISOs.

In my next post, I will write about installing one of them as a guest OS on my new Linux Mint 21 host via VMware Workstation 16 Pro.

How to Install & Use KVM Virtualization on CentOS 7.5

 Linux, Virtualization  Comments Off on How to Install & Use KVM Virtualization on CentOS 7.5
Dec 042018
 

If you want to learn virtualization, there are many avenues.

You can use Oracle VirtualBox, VMWare, KVM, Xen, HyperV, etc.

Since I was already familiar with other virtualization routes like Oracle VirtualBox, VMWare and HyperV, I decided to take the KVM plunge.

KVM stands for Kernel-based Virtual Machine and has been around since early 2007.

Before diving into KVM, first check if your CPU supports VT features in virtualization (Intel VT or AMD-V)

Use the below command to find whether your CPU supports VT features.

$ egrep '(vmx|svm)' /proc/cpuinfo
flags		: fpu vme de pse tsc msr pae mce cx8 apic sep mtrr pge mca cmov pat pse36 clflush dts acpi mmx fxsr sse sse2 ss ht tm pbe syscall nx lm constant_tsc arch_perfmon pebs bts rep_good nopl aperfmperf eagerfpu pni dtes64 monitor ds_cpl vmx smx est tm2 ssse3 cx16 xtpr pdcm sse4_1 xsave lahf_lm tpr_shadow vnmi flexpriority dtherm

As we can see from the above output, my CentOS 7.5 system has vmx.

So I’m good to go with KVM.

To manage the KVM virtual machines, I went ahead and installed the open source Virt Manager GUI for KVM.

Besides KVM, Virt-Manager is also said to support Xen and LXC (Linux Containers).

Here are the commands I used to install KVM on my CentOS 7.5 system.

$ sudo yum install -y qemu-kvm qemu-img virt-manager libvirt libvirt-python libvirt-client virt-install virt-viewer

Package 10:qemu-kvm-1.5.3-156.el7_5.5.x86_64 already installed and latest version
Package 10:qemu-img-1.5.3-156.el7_5.5.x86_64 already installed and latest version
Package bridge-utils-1.5-9.el7.x86_64 already installed and latest version
Resolving Dependencies
--> Running transaction check

[output truncated]

Good, you’ve now got KVM installed. It’s time to test it.

So I went and downloaded the lightweight Lubuntu 18.04.1.

If you’re on the Gnome 3.28 desktop, go to Applications—>System Tools—>Virtual Machine Manager.

This will open the Virtual Machine Manager and allow you to add whatever virtual machine you want to KVM.

I quickly attached Lubuntu 18.04.1 to KVM through the Virtual Machine Manager.

KVM with VM Lubuntu Attached

Voila, that’s it.

I was delighted that I had added one more item to my virtualization jewel-box.

The whole process of installing KVM and adding/updating Lubuntu took less than 15 minutes.

By the way, the above KVM installation was tested on CentOS 7.5 (kernel 3.10.0-862.11.6) running on an old Dell Optiplex 780SFF.

Useful Resources:
KVM
KVM on Wikipedia
Virt Manager

How To Add Guest Additions to Lubuntu 16.04

 How To, Linux, Virtualization  Comments Off on How To Add Guest Additions to Lubuntu 16.04
Apr 262016
 

I have Lubuntu running as a virtual machine via VirtualBox.

Like many Ubuntu fans, I upgraded to version 16.04 LTS (Xenial Xerus) yesterday.

The reason for my upgrade was that Ubuntu 15.10 (a.k.a. Wily Werewolf) was not a Long-term Supported distribution.

Support for Ubuntu 15.10 ends in July 2016 while Ubuntu 16.04 LTS will be supported until April 2021.

The upgrade from Ubuntu 15.10 to Ubuntu 16.04 LTS went smoothly.

Following the upgrade, I rebooted my virtual machine.

And then came the familiar problem all of us confront with VirtualBox – screen resolution issue.

The problem is that the monitor settings (screen resolution) will be off and the desktop will not occupy the full screen.

Irritating but not a showstopper.

However, the problem can be fixed quickly.

This is how I fixed the screen resolution issue after upgrading from Ubuntu 15.10 to Ubuntu 16.04 LTS.

I opened up the terminal and installed virtualbox-guest-dkms.

tommy@johnson:~$ sudo apt-get install virtualbox-guest-dkms
[sudo] password for tommy: 
Reading package lists... Done
Building dependency tree       
Reading state information... Done
The following additional packages will be installed:
  libnotify-bin virtualbox-guest-utils virtualbox-guest-x11
The following NEW packages will be installed:
  libnotify-bin virtualbox-guest-dkms virtualbox-guest-utils virtualbox-guest-x11
0 upgraded, 4 newly installed, 0 to remove and 0 not upgraded.
Need to get 1,986 kB of archives.
After this operation, 13.1 MB of additional disk space will be used.
Do you want to continue? [Y/n] y
Get:1 http://us.archive.ubuntu.com/ubuntu xenial/main amd64 libnotify-bin amd64 0.7.6-2svn1 [6,584 B]
Get:2 http://us.archive.ubuntu.com/ubuntu xenial/multiverse amd64 virtualbox-guest-utils amd64 5.0.18-dfsg-2build1 [387 kB]
Get:3 http://us.archive.ubuntu.com/ubuntu xenial/multiverse amd64 virtualbox-guest-dkms all 5.0.18-dfsg-2build1 [551 kB]
Get:4 http://us.archive.ubuntu.com/ubuntu xenial/multiverse amd64 virtualbox-guest-x11 amd64 5.0.18-dfsg-2build1 [1,041 kB]
Fetched 1,986 kB in 0s (2,399 kB/s)         
....
....

Once the installation is complete, there’s one more step.

You need to reboot the newly upgraded virtual machine (Ubuntu 16.04 LTS).

$ sudo reboot

After rebooting,you should now have access to the full screen.

As simple as that.

Related Posts:
What are Guest Additions?

What are Guest Additions?

 Linux, Virtualization  Comments Off on What are Guest Additions?
Dec 102015
 

How to Add Guest Additions to Virtual BoxAnyone who has installed Oracle’s VirtualBox virtualization software inevitably encounters a few vexing problems.

The main problem is that your monitor settings (screen resolution) will be off and the desktop will not occupy the full screen.

Plus, there are usually issues with your mouse with the guest OS.

Here’s where the concept of Guest Additions comes into the picture.

Unless you install Guest Additions, you’ll continue to have problems with your installation of the guest OS under VirtualBox.

Guest Additions

So what exactly are Guest Additions?

Guest Additions are basically drivers for the guest OS and enabled shared folders.

Before installing Guest Additions, you must install a few prerequisites.

If you’re running CentOS, run the below command as root or sudo to install prerequisites like Dynamic Kernel Module Support, GNU Compiler Collection, etc on the guest OS.

# yum install gcc g++ dkms kernel-devel

Once the installation of dkms, gcc, etc is complete, open the VirtualBox VM for the guest OS, then select Devices tab in the top row, scroll down and pick the Insert Guest Additions option.

What happens now is that the Guest Additions ISO is mounted in the virtual CD drive of the virtual machine (guest OS). Continue reading »

Tip of the Day – Fixing Screen Resolution on VirtualBox

 Linux, Virtualization  Comments Off on Tip of the Day – Fixing Screen Resolution on VirtualBox
Aug 022015
 

UbuntuAfter installing Ubuntu or any other guest distro based on Ubuntu like Backbox or LinuxMint as a guest OS through Oracle’s VirtualBox virtualization software, you’re often bound to experience problems with the screen resolution (the guest OS appears smaller and in the middle of the screen).

Fortunately, the solution to the screen resolution problem is simple.

Open your terminal on the guest OS and run the below command.

$ sudo apt-get install virtualbox-guest-utils virtualbox-guest-x11 virtualbox-guest-dkms

Once the installation is complete, restart your VirtualBox guest OS and the screen resolution problem will be fixed.

Important: I have tested the above method and it works fine on VirtualBox 4.3.28 with a Linux Mint 17.2 host OS and Backbox 4.3 guest OS.

VirtualBox Matures into 5.0 with Improved Security

 Virtualization  Comments Off on VirtualBox Matures into 5.0 with Improved Security
Jul 102015
 

Where to Download VirtualBox 5.0

Oracle’s cross-platform virtualization software VirtualBox has hit release 5 with enhanced security and usability features.

Designed to run on standard x86 desktop and laptop computers, VirtualBox lets developers and other users run multiple operating systems in secure containers without the overhead of using a full server environment.

For instance, if you have VirtualBox on a Windows 7 laptop then you can install Fedora or any other supported guest OS in a secure container.

Enhancements in Virtualbox 5.0

* Disk Image Encryption – Data can be encrypted on virtual hard disk images during runtime using AES algorithm with up to 256 bit data encryption keys (DEK). This feature enables data to remain secure and encrypted at all times, whether the virtual machine is sitting unused on a developer’s machine or server, or actively in use.

* Bi-Directional Drag and Drop Support for Windows – On all host platforms, Windows, Linux and Oracle Solaris guests now support “drag and drop” of content between the host and the guest. An extremely handy feature, the drag and drop feature allows copying or opening of files and directories between the host and the guest.

* Support for USB 3.0 Devices – Guest operating systems can now directly recognize USB 3.0 devices and operate at full 3.0 speeds. Guest OS can be configured to support USB 1.1, 2.0, and 3.0.

* Improved CPU Utilization: Performance boost is obtained by exposing a broader set of CPU instructions to the guest OS, enabling applications to make use of latest hardware instruction sets.

* Paravirtualization Support for Windows and Linux Guests – Improves guest OS performance by leveraging built-in virtualization support on operating systems like Oracle Linux 7 and Windows 7.

* GUI improvements – Allow hotplugging support for SATA disks, direct access to storage media in the virtual machine selector and VM guest-content scaling support (including 3D acceleration).

* New Guest OS – Support for additional guest OS such as Windows 10, Windows Server 2012 R2 and new Linux platforms like Fedora 22.

Download Virtualbox 5.0 here.