How to Check Yum History in Red Hat or CentOS

 Command Line, Linux  Comments Off on How to Check Yum History in Red Hat or CentOS
Nov 252015
 

One of the most frequently used commands by Linux administrators of a Red Hat or CentOS system is the yum package management tool.

Yum History – What For?

Some would argue that Yum is the most powerful tool in a Linux systems administrator’s command line arsenal.

So what does yum do?

Yum Search vs Yum List

Yum is used for installing and upgrading packages, checking for updates, searching for packages, listing installed and available packages, downloading packages, adding and enabling/disabling repositories and installing local packages.

The beauty of yum is that when you install an update or package it automatically resolves dependencies (i.e. it installs all the other software required for your package to work).

But why is the yum history of any importance to a Linux administrator?

Knowing what commands we ran with yum and when we ran them is extremely useful in investigating problems, should they arise, and to roll back updates or remove packages if necessary.

Here are a few key commands to check yum history.

Remember to run yum history commands as root or sudo.

1. List the Last 20 Yum Transactions

$ sudo yum history list
Loaded plugins: aliases, changelog, fastestmirror, langpacks
ID     | Command line             | Date and time    | Action(s)      | Altered
-------------------------------------------------------------------------------
   102 | update mate*             | 2015-11-24 09:32 | Update         |    1   
   101 | update atril             | 2015-11-24 09:31 | Update         |    3  
   100 | update -y                | 2015-11-18 10:15 | Update         |    1 
    99 | update -y                | 2015-11-14 09:09 | Update         |    1   
    98 |                          | 2015-11-11 14:14 | Erase          |    4 EE
    97 | update -y                | 2015-11-11 09:29 | Update         |    1 EE
    96 | update -y                | 2015-11-06 15:11 | Update         |    6
    [output truncated]

2. List All Yum Transactions

The below command will spit out the entire history of yum commands which can go back a year or even earlier depending on the age of your CentOS or RedHat system.

$ sudo yum history list all
Loaded plugins: aliases, changelog, fastestmirror, langpacks
ID     | Login user  | Date and time    | Action(s)      | Altered
-------------------------------------------------------------------------------
   103 | michaelpc   | 2015-11-25 16:14 | Update         |    1   
   102 | michaelpc   | 2015-11-24 09:32 | Update         |    1   
   101 | michaelpc   | 2015-11-24 09:31 | Update         |    3  <
   100 | michaelpc   | 2015-11-18 10:15 | Update         |    1 > 
    99 | michaelpc   | 2015-11-14 09:09 | Update         |    1   
    98 | michaelpc   | 2015-11-11 14:14 | Erase          |    4 EE
    97 | michaelpc   | 2015-11-11 09:29 | Update         |    1 EE
    [output truncated]

3. Selective Yum History

The yum history command is flexible enough that you can tweak it to get the output you want.

For instance, in the below example we’re looking at yum history from IDs 20 through 25.

$ sudo yum history list 20..25
Loaded plugins: aliases, changelog, fastestmirror, langpacks
ID     | Command line             | Date and time    | Action(s)      | Altered
-------------------------------------------------------------------------------
    25 | install clamtk-5.15-1.el | 2015-03-30 08:06 | Install        |   44   
    24 | install clamav clamtk    | 2015-03-30 08:00 | Install        |    4   
    23 | groupinstall MATE Deskto | 2015-03-23 09:38 | Install        |  133   
    22 | install docker           | 2015-03-22 08:51 | Install        |    1   
    21 | install yum-plugin-chang | 2015-03-13 21:57 | Install        |    2   
    20 | install yum-plugin-alias | 2015-03-13 21:55 | Install        |    1

4. Specific Yum Event
In this below example from my CentOS 7 system, when I ran yum history for ID 25, I found that on March 30, 2015 at 8:06AM I’d installed the Clam anti-virus software.

Now you see how powerful yum history is.

$ sudo yum history list 25
Loaded plugins: aliases, changelog, fastestmirror, langpacks
ID     | Command line             | Date and time    | Action(s)      | Altered
-------------------------------------------------------------------------------
    25 | install clamtk-5.15-1.el | 2015-03-30 08:06 | Install        |   44

5. Yum History Summary

When all you’re looking for is the summary of yum history, the below command is what you’d run.

$ sudo yum history summary
Loaded plugins: aliases, changelog, fastestmirror, langpacks
Login user    | Time                | Action(s)        | Altered 
-------------------------------------------------------------------------------
michaelpc     | Last day            | Update           |        1
michaelpc     | Last week           | Update           |        4
michaelpc     | Last 2 weeks        | Update           |        2
michaelpc     | Last 3 months       | D, E, I, U       |      208
michaelpc     | Last 6 months       | E, I, O, U       |      313
System        | Last 6 months       | Install          |        1
michaelpc     | Last year           | E, I, O, U       |     2026
System        | Last year           | I, U             |    363

Folks, I hope the above post has given you a good overview of yum history commands.

How to Set Up Password Aging on CentOS 7

 Command Line, Linux  Comments Off on How to Set Up Password Aging on CentOS 7
Aug 052015
 

How to Set Password Aging on CentOS 7In this age of relentless online attacks by criminals, forcing password changes upon users is a must adopt security policy.
As any seasoned Linux system administrator will tell you, only idiots don’t implement password aging.

The concept of setting timelines for password validity is known as password aging.

The key advantage of password aging (forcing password changes) is that even if a password is cracked or stolen, its value to criminals is only for a short window of time.

In a sign of its importance, some US banks are already enforcing password changes for its customers at periodic intervals (90 days, 120 days or 180 days, depending on the bank).

Password Aging on CentOS 7

In this post, we’ll examine how to set up password aging on CentOS 7 and Red Hat Enterprise Linux 7. Continue reading »

Linux Tip of the Day – Yum Search vs Yum List

 Command Line  Comments Off on Linux Tip of the Day – Yum Search vs Yum List
Jul 292015
 

Yum Search vs Yum ListYum is one of the most powerful tools in the arsenal of a RedHat or CentOS systems administrator for package management.

When installing, upgrading, removing or searching for packages, yum is the best choice because it automatically resolves dependencies.

In this post, let’s examine the difference between yum search and yum list commands.

While both command are used to find a package, yum search is more comprehensive.

When you run yum search, the command searches for package name, summaries and description.

But yum list only looks for the search term in the package name.

Here’s an example of how the two commands differ in their results.

Let’s first try yum search without any glob expression.

# yum search vim
vim-gtk-syntax.noarch : Vim syntax highlighting for GLib, Gtk+, Gstreamer, and more
vim-vimoutliner.noarch : Script for building an outline editor on top of Vim
beakerlib-vim-syntax.noarch : Files for syntax highlighting BeakerLib tests in VIM editor
golang-vim.noarch : Vim plugins for Go
protobuf-vim.x86_64 : Vim syntax highlighting for Google Protocol Buffers descriptions
vim-X11.x86_64 : The VIM version of the vi editor for the X Window System
vim-clustershell.noarch : VIM files for ClusterShell
vim-common.x86_64 : The common files needed by any version of the VIM editor
vim-enhanced.x86_64 : A version of the VIM editor which includes recent enhancements
vim-filesystem.x86_64 : VIM filesystem layout
vim-minimal.x86_64 : A minimal version of the VIM editor
vile-common.x86_64 : The common files needed by any version of the VIM editor
youtube-dl.noarch : A small command-line program to download online videos

As we can see in the above output, vim is present in both the package name and description.

Now let’s run the yum list command with the wildcard character * and examine the results.

# yum list '*vim*'
Installed Packages
vim-common.x86_64                                                                        2:7.4.160-1.el7                                                               @base    
vim-enhanced.x86_64                                                                      2:7.4.160-1.el7                                                               @base    
vim-filesystem.x86_64                                                                    2:7.4.160-1.el7                                                               @base    
vim-minimal.x86_64                                                                       2:7.4.160-1.el7                                                               @anaconda
Available Packages
beakerlib-vim-syntax.noarch                                                              1.10-2.el7                                                                    epel     
golang-vim.noarch                                                                        1.3.3-3.el7                                                                   base     
protobuf-vim.x86_64                                                                      2.5.0-7.el7                                                                   epel     
vim-X11.x86_64                                                                           2:7.4.160-1.el7                                                               base     
vim-clustershell.noarch                                                                  1.6-4.el7                                                                     epel     
vim-gtk-syntax.noarch                                                                    20130716-1.el7                                                                epel     
vim-vimoutliner.noarch                                                                   0.3.7-5.el7                                                                   epel

As we see from the above results, yum list only considers the search term in the package name.

By the way, yum search all is even more exhaustive but runs a bit slower.

How to List Software Installed by Date on a Linux System

 Command Line, Linux  Comments Off on How to List Software Installed by Date on a Linux System
Jul 202015
 

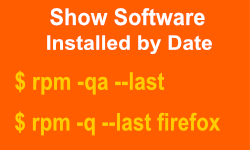
Commands to List Software Installed by Date on Linux SystemsIt’s easy to get a list of all the software installed or upgraded on a Linux system.
If you’re running CentOS, RedHat or Fedora, just run the below command on the terminal to get the complete list of all software installed on your PC or server.

$ rpm -qa

If you’re running Debian, Ubuntu or Linux Mint, go with either of the below commands.

$ dpkg --get-selections

The following command will work fine too.

$ dpkg -l

Software Installed by Date

RPM Based Linux Systems

However, there are occasions when we’d like to know about the software on our Linux system by date of installation. Continue reading »

How to Properly Reboot or Shut Down a Linux System

 Command Line, How To, Linux  Comments Off on How to Properly Reboot or Shut Down a Linux System
Jul 092015
 

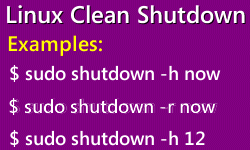
How to do Clean ShutdownLearning how to do a clean shut down of a Linux system is important if you don’t want to mess up your computer.

Just pressing your finger on the power button will certainly shut down or reboot your Linux system. But it can also cause serious damage like data corruption.

Remember, Linux is constantly writing data to disk even if it’s not apparent to you. Also, Linux keeps data in memory although it might appear to have written the data to disk.

So it’s crucial to do an orderly shutdown of a Linux desktop or server.

When you do a clean or orderly shutdown, you’re essentially informing users and processes on the Linux system of the shutdown and blocking new logins.

In this post, we’ll cover various options to properly reboot and shut down a Linux system.

You must be root or use sudo to run the shutdown command.

When I tried to run shutdown without being root or using sudo, I got the following error:

[thomas@localhost ~]$ shutdown
Must be root.

Continue reading »

10 Key DU Commands for Linux Newbies

 Command Line, Linux  Comments Off on 10 Key DU Commands for Linux Newbies
May 202015
 

Simply put, the du command gives you the size (disk usage) of a directory and files.

In the face of growing storage requirements and huge data warehouses, familiarity with the du command would stand Linux newbies in good stead.

Here’s the synopsis of du from the man pages.

SYNOPSIS
du [OPTION]… [FILE]…
du [OPTION]… –files0-from=F

Let’s now consider some key du commands that Linux system administrators will find extremely handy.

Default Command

$ du

Running the above command will spit out a list of all directories in the current working directory and their size.

Total size of the current directory (including sub-directories and files) is provided at the end.

Although the results will not mention it, disk usage output is given in Kilobytes.

Summary Output
Far too often, we just need summary size of a directory, not pages of details.

In such situations, we’ll go with the -s option.

$ du -s

It’s simple but not that user-friendly since the output is provided in Kilobytes (who uses Kilobytes in an era of Gigabytes and Terabytes).

Human Readable Format
When you use the -h option (-h stands for human readable format) with du, you’ll see an easy to grasp output.

$ du -h

Depending on their size, file and directory sizes are suffixed with K (kilobytes), M (megabytes) or G (gigabytes). Continue reading »